Design Process Of: My Live In The Moment Polaroid & Video
Design Process of: MY LIVE IN THE MOMENT POLAROID & VIDEO
The above video depicts me physically making a phrase based on something I’ve learned in my life so far. In my second year of uni, over the Christmas holiday 2018 – 19, one of our projects was to fulfil this brief: Produce a typographic response, inspired by Stefan Sagmeister’s book, ‘Things I have learned in my life so far’. Your ‘thing’ learned should be a phrase or sentence specific to you and the final outcome should be an A3 poster.
Sagmeister’s 256-page book was published in spring 2008 by Abrams and featured 15 alternative covers. I really liked the evocative type in 3D form which sometimes clearly evoked the message, but in others had hidden messages within it.
I was also inspired by an ex-student called Yee Poon, who created the phrase “Trust Your Gut” using food and it was really well art directed, with wide shots and close-ups of her creating the sentence. The pacing of the video was really good too, giving more time to elements that were interesting or difficult. Overall it was wonderfully made, however a lingering slow-motion shot of her squishing the mince was untidy and didn’t fit with the sharp editing of the video. The shot also went on for too long, but no body’s perfect.
This inspired me to create a video as part of my outcome too. I began my creative process by writing down a range of things I’d learned in my life on a mind map then selected the one that I felt represented how I was feeling at the time. I am a very sentimental person my nature and spent a lot of time thinking about the past or worrying about the future and forgetting to have a good time in the present. I had recently been getting a lot better though, so “live in the moment” was my meaningful choice.
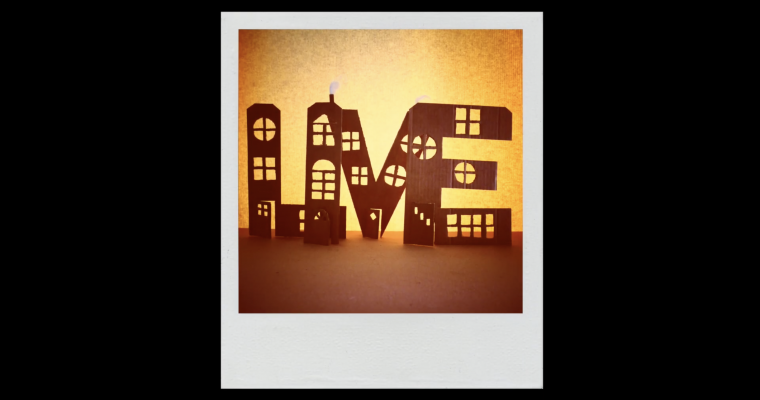
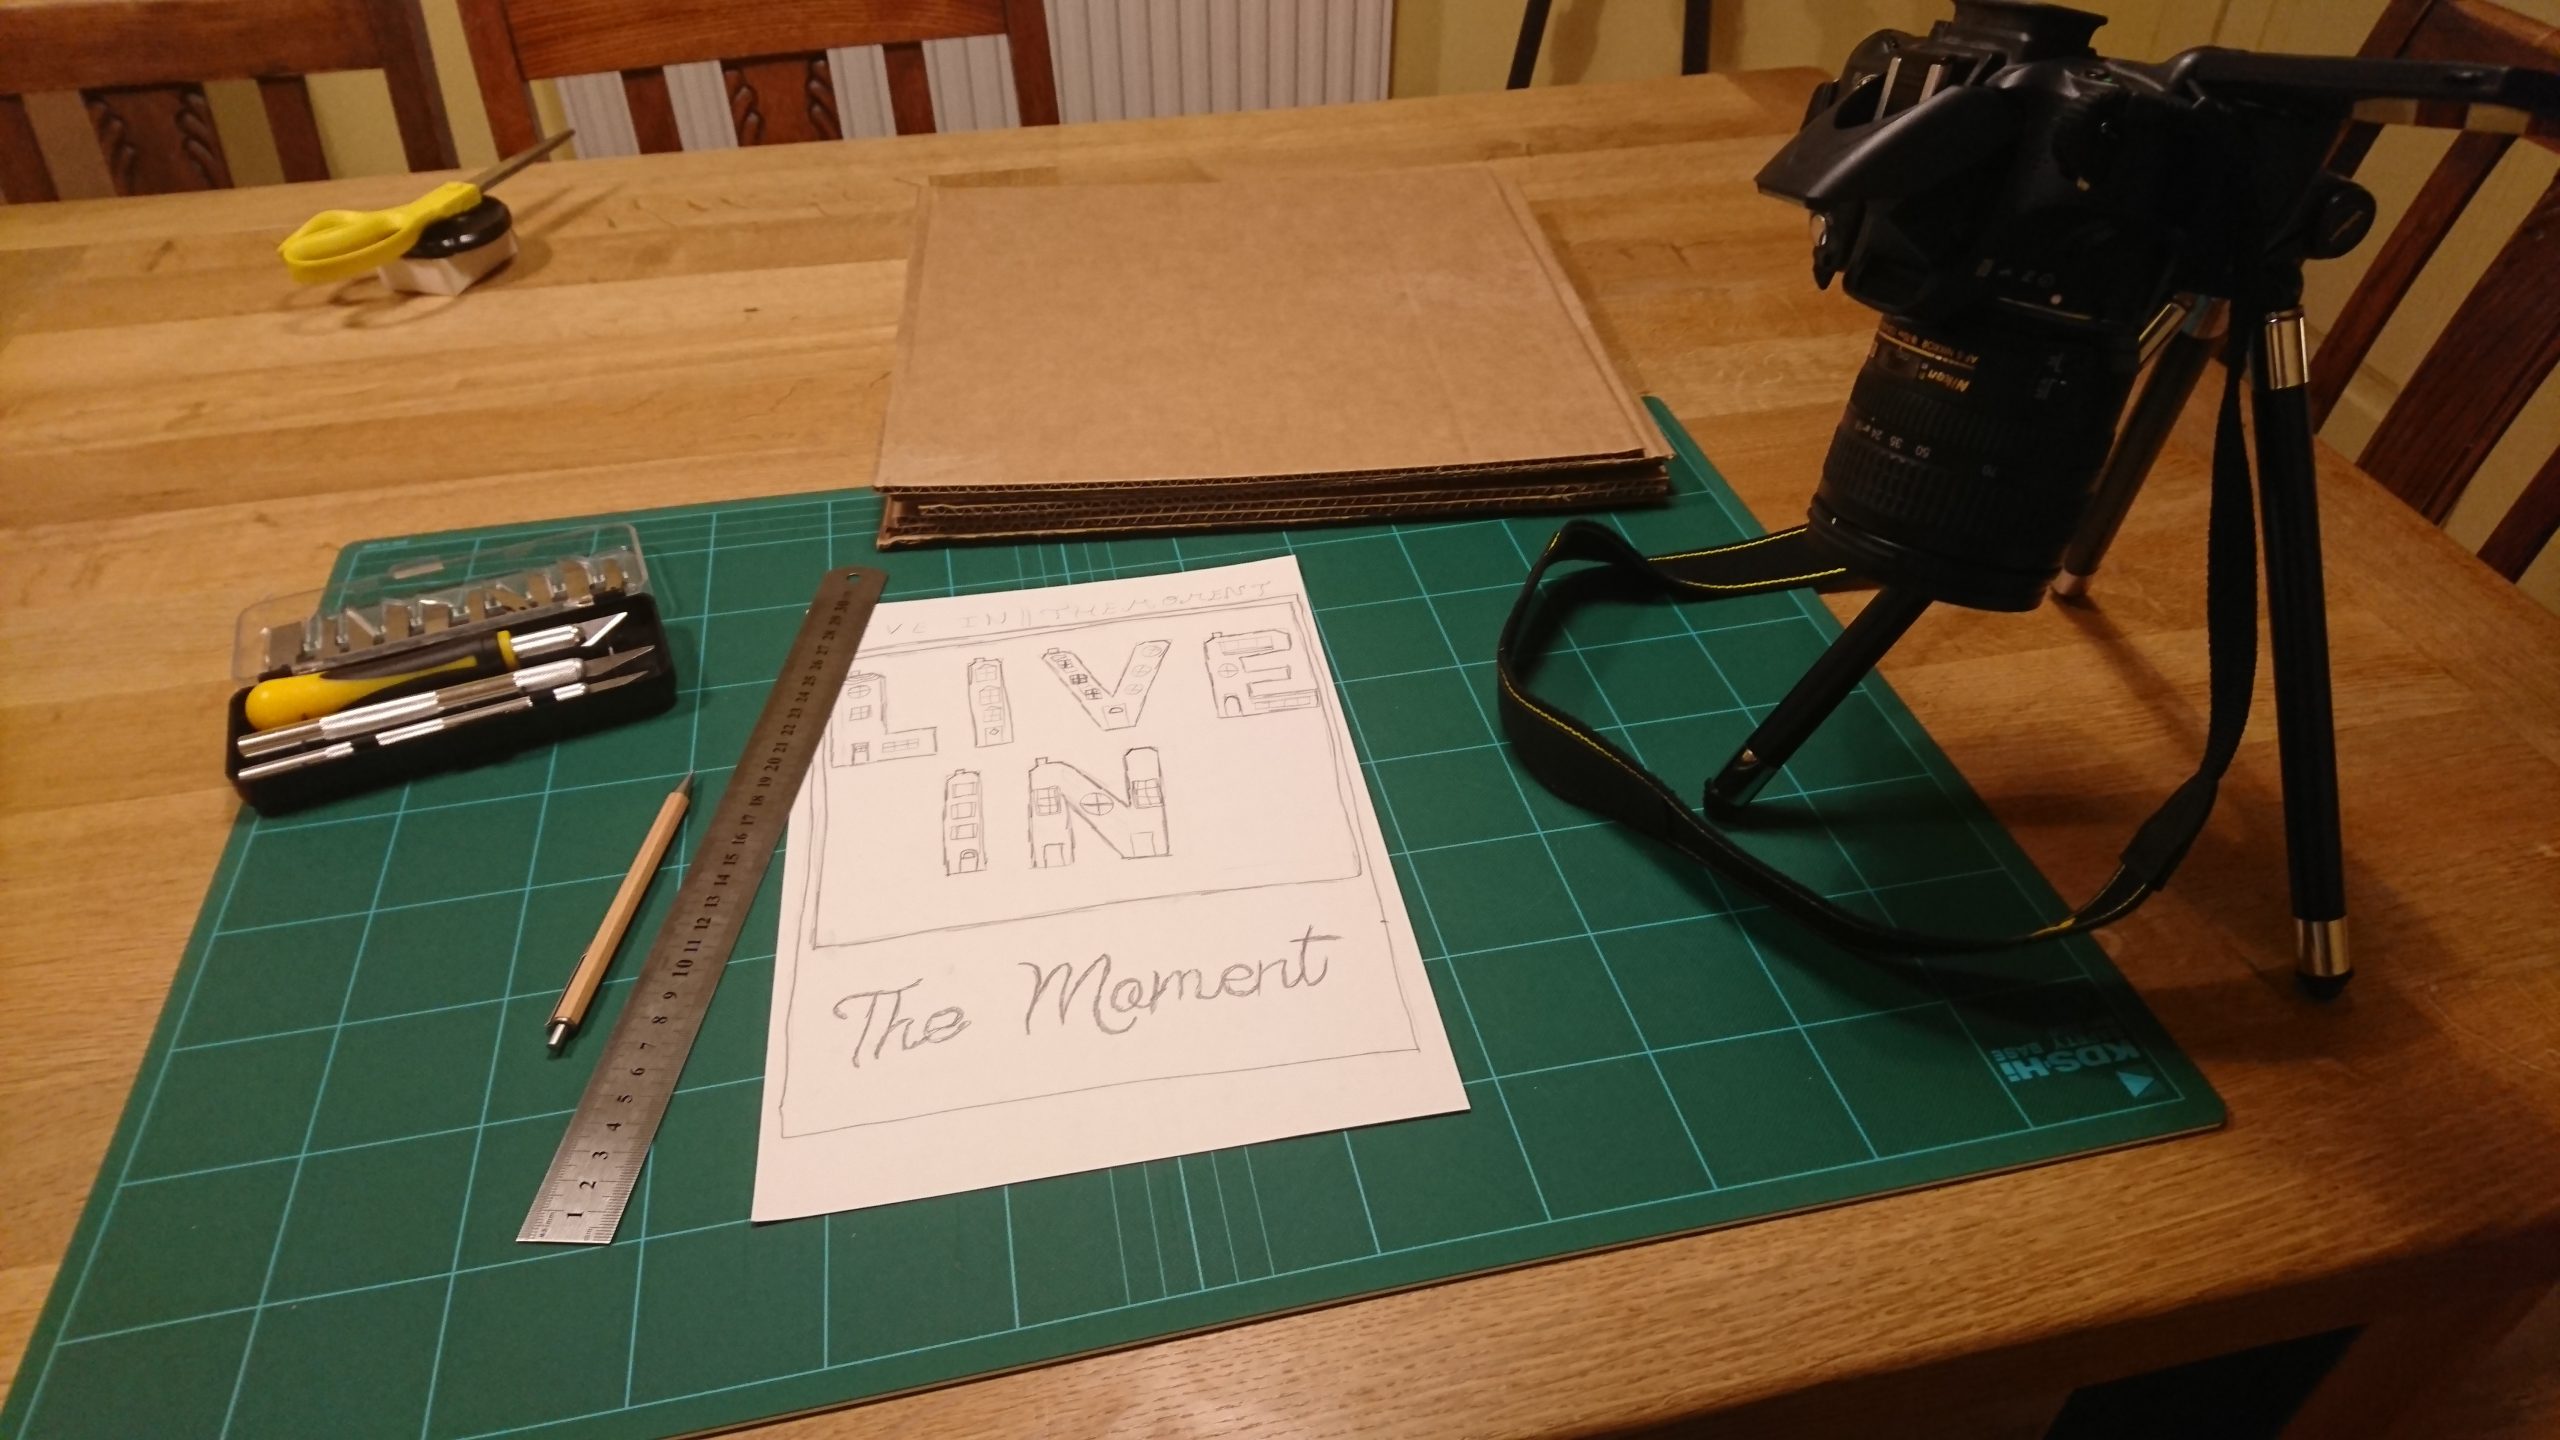
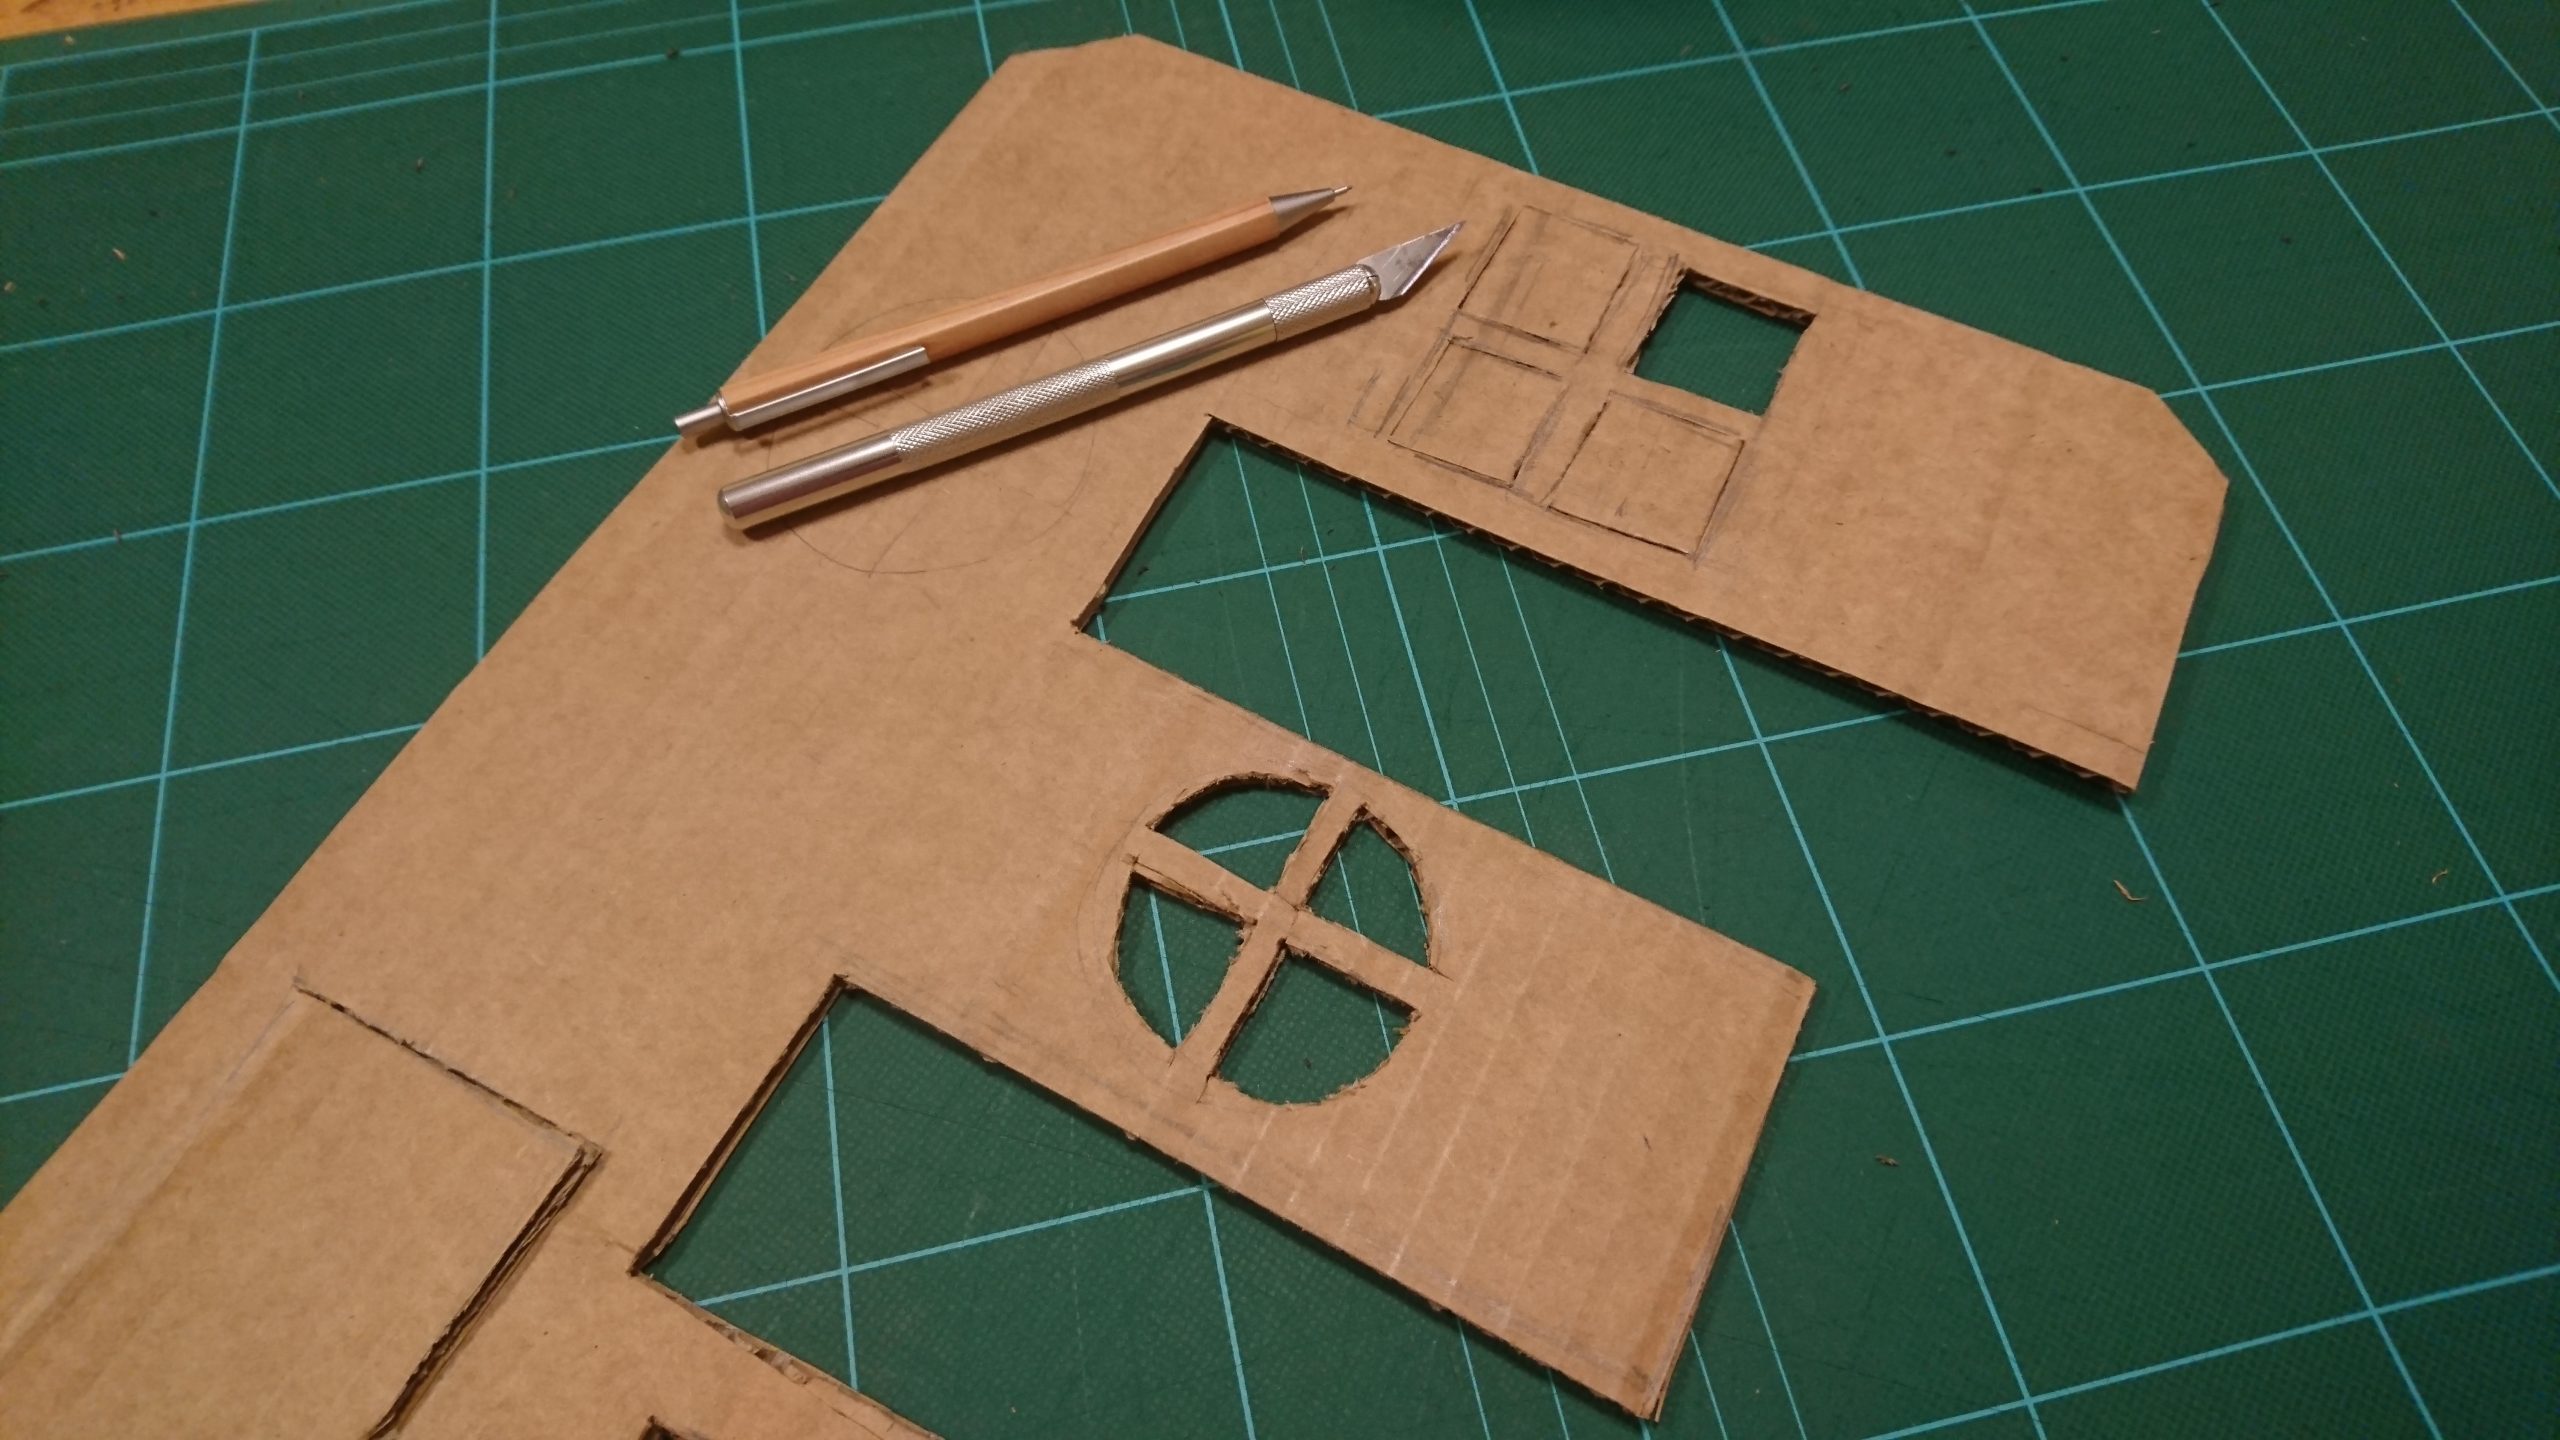
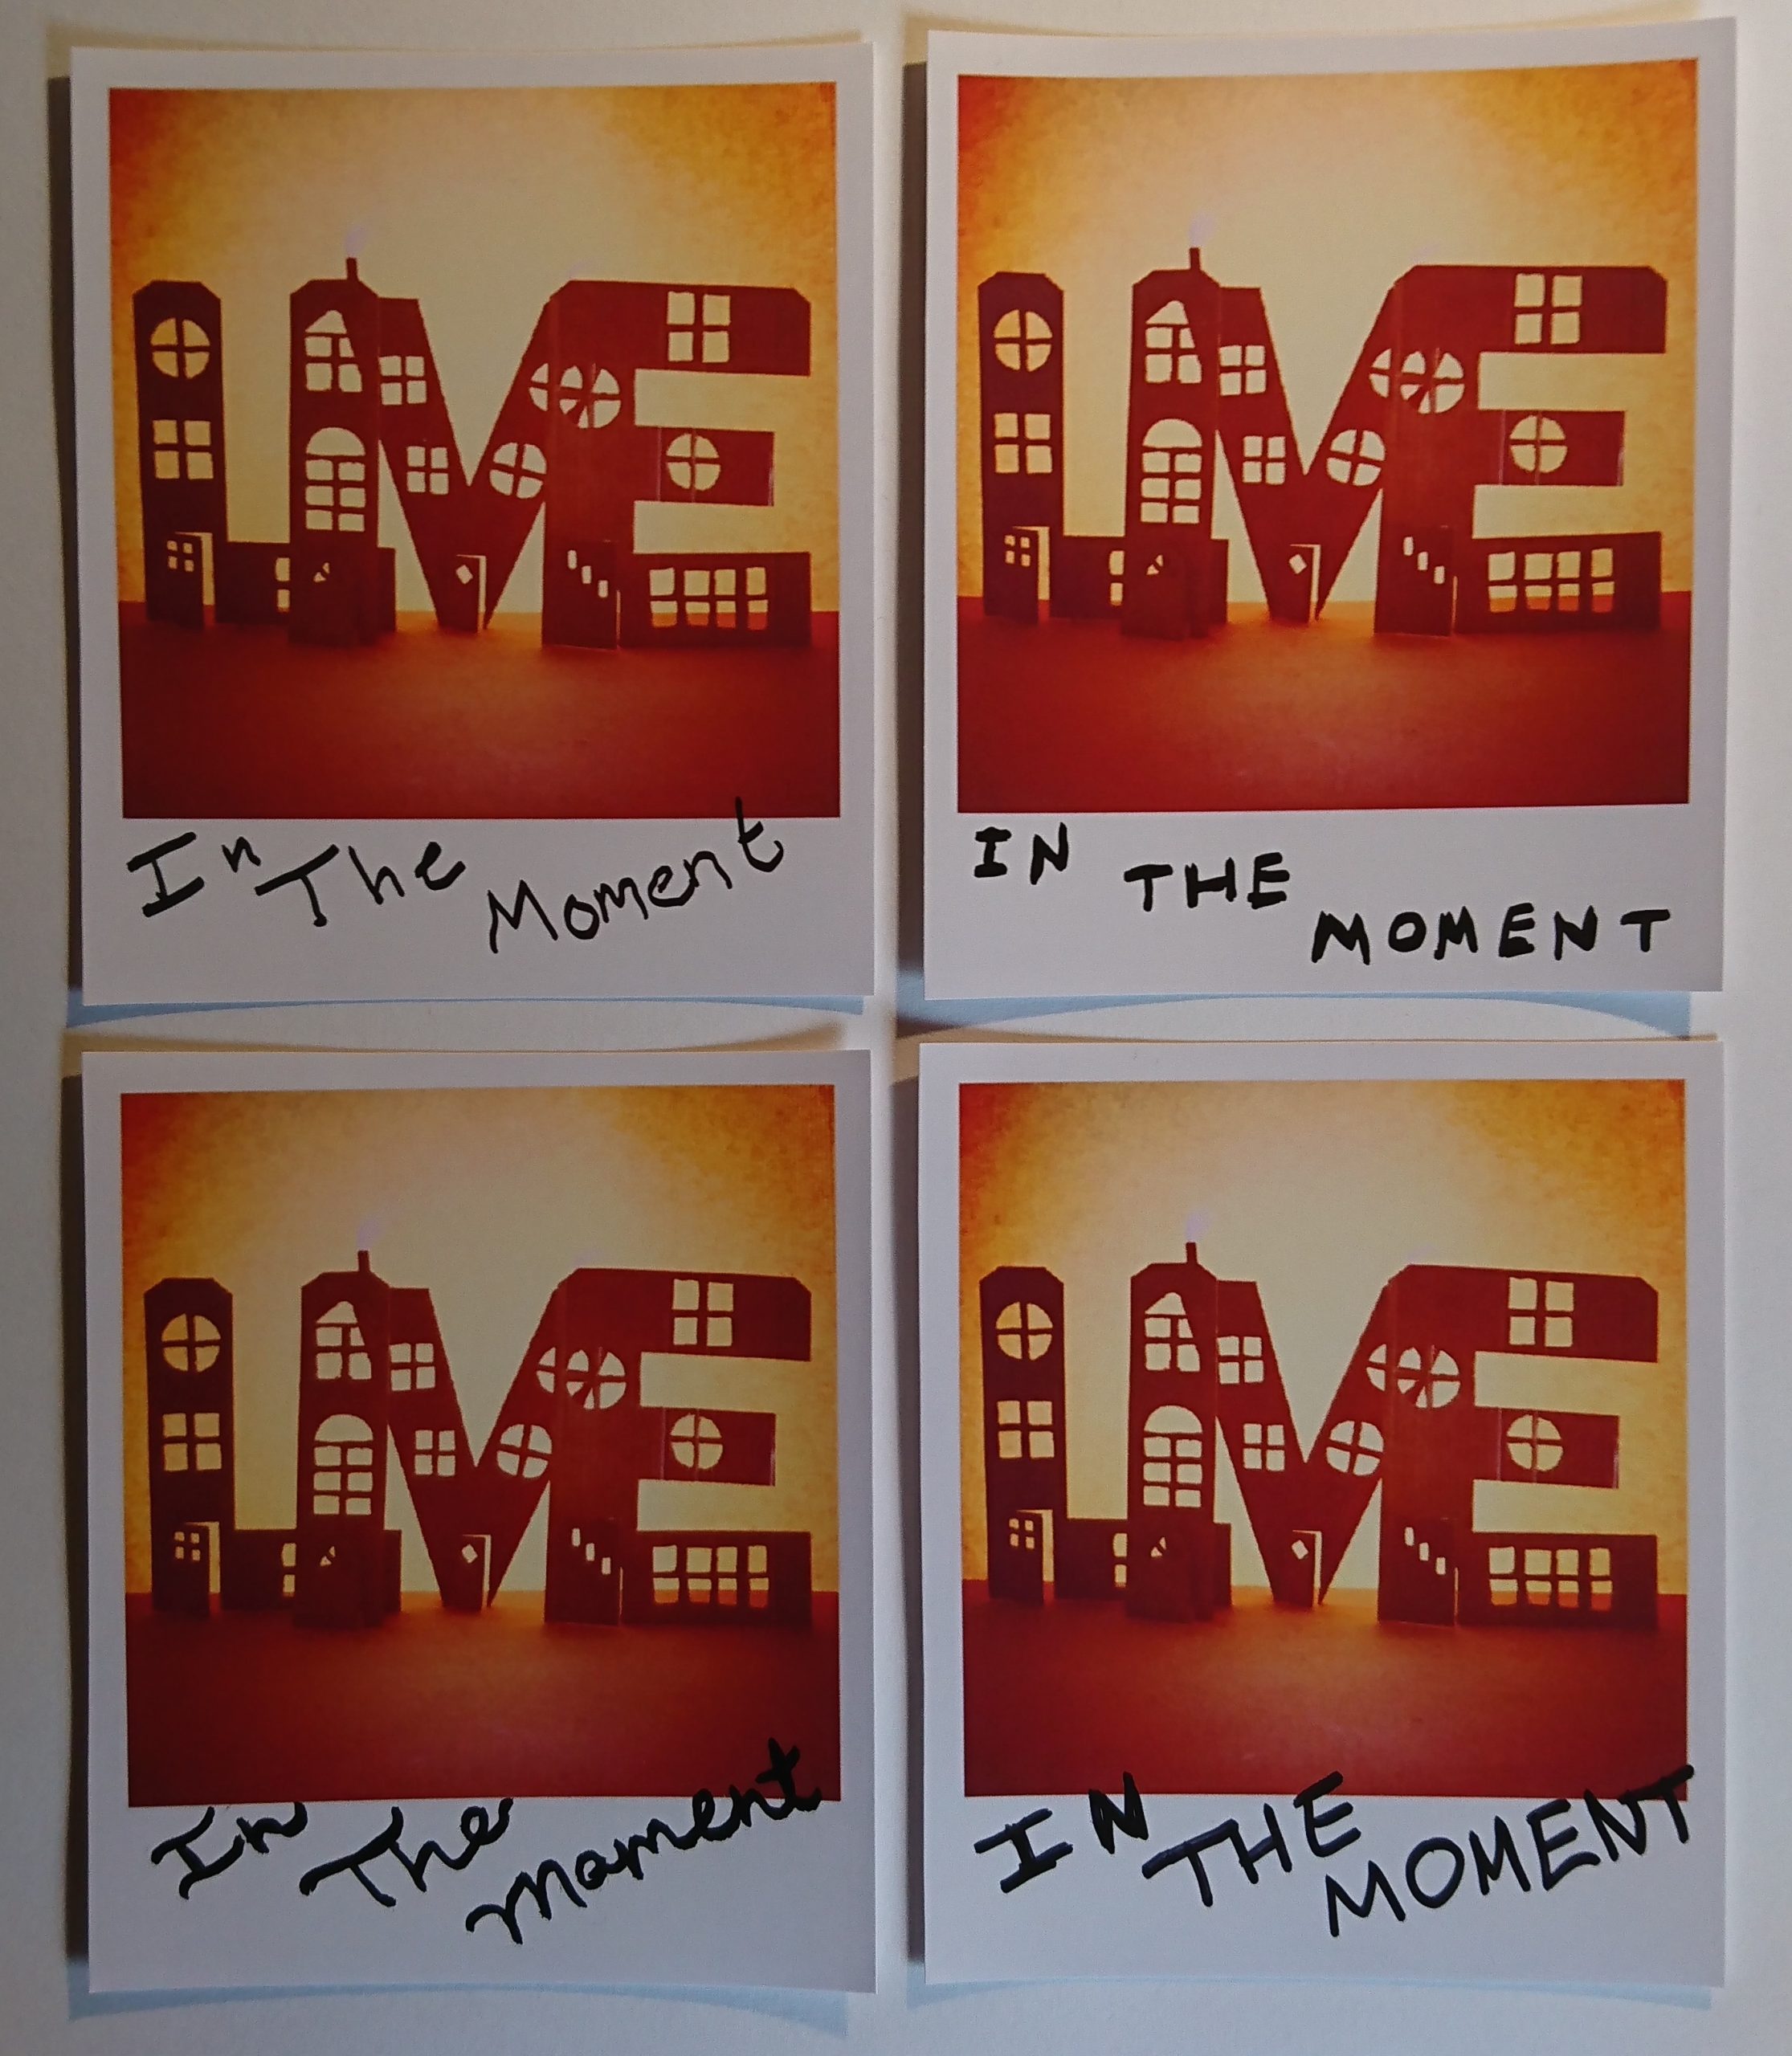
I then sketched out some ideas for my A3 poster. I wanted to create an oversized polaroid photo with the image being cardboard cut-out letters forming the words “live in”. The cut-outs would look like houses to symbolise physically living in somewhere. Then I would write “the moment” underneath by hand as a personal message to finish off the piece. I wanted to use the iconic polaroid as my platform as it captures a moment in time with a physical photo that can’t just be printed again. I felt my idea worked on multiple levels and I was happy with it.
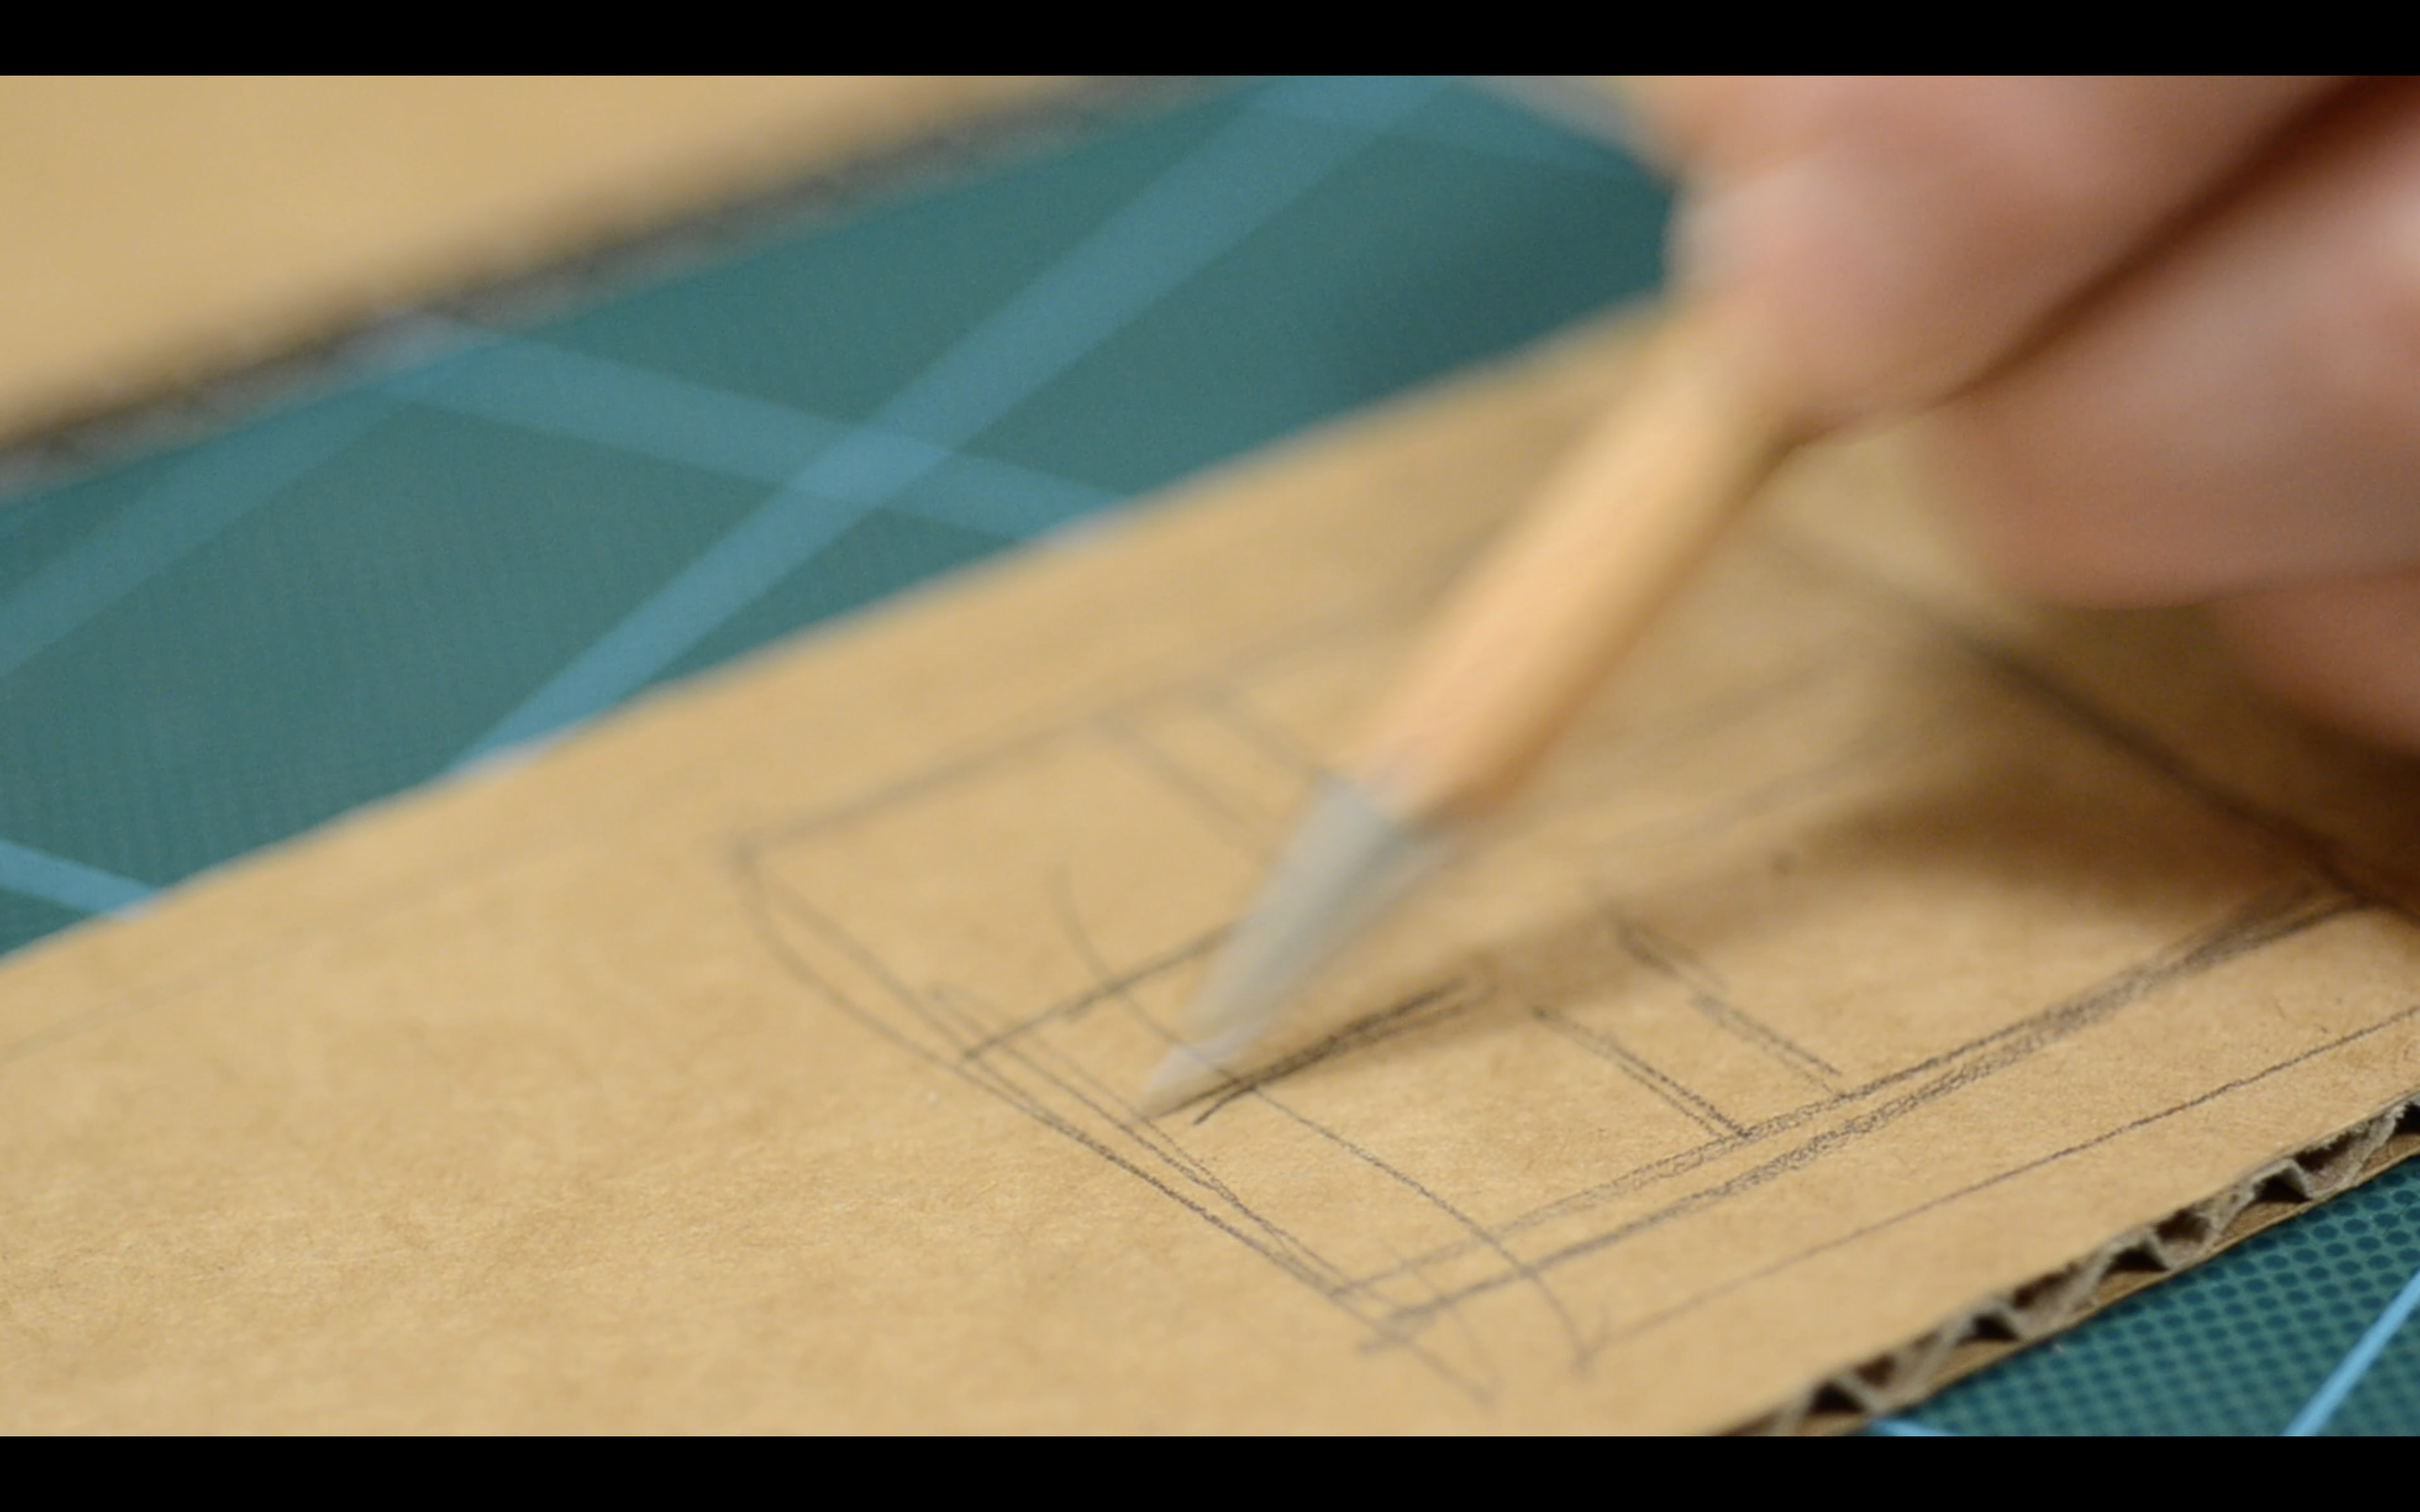
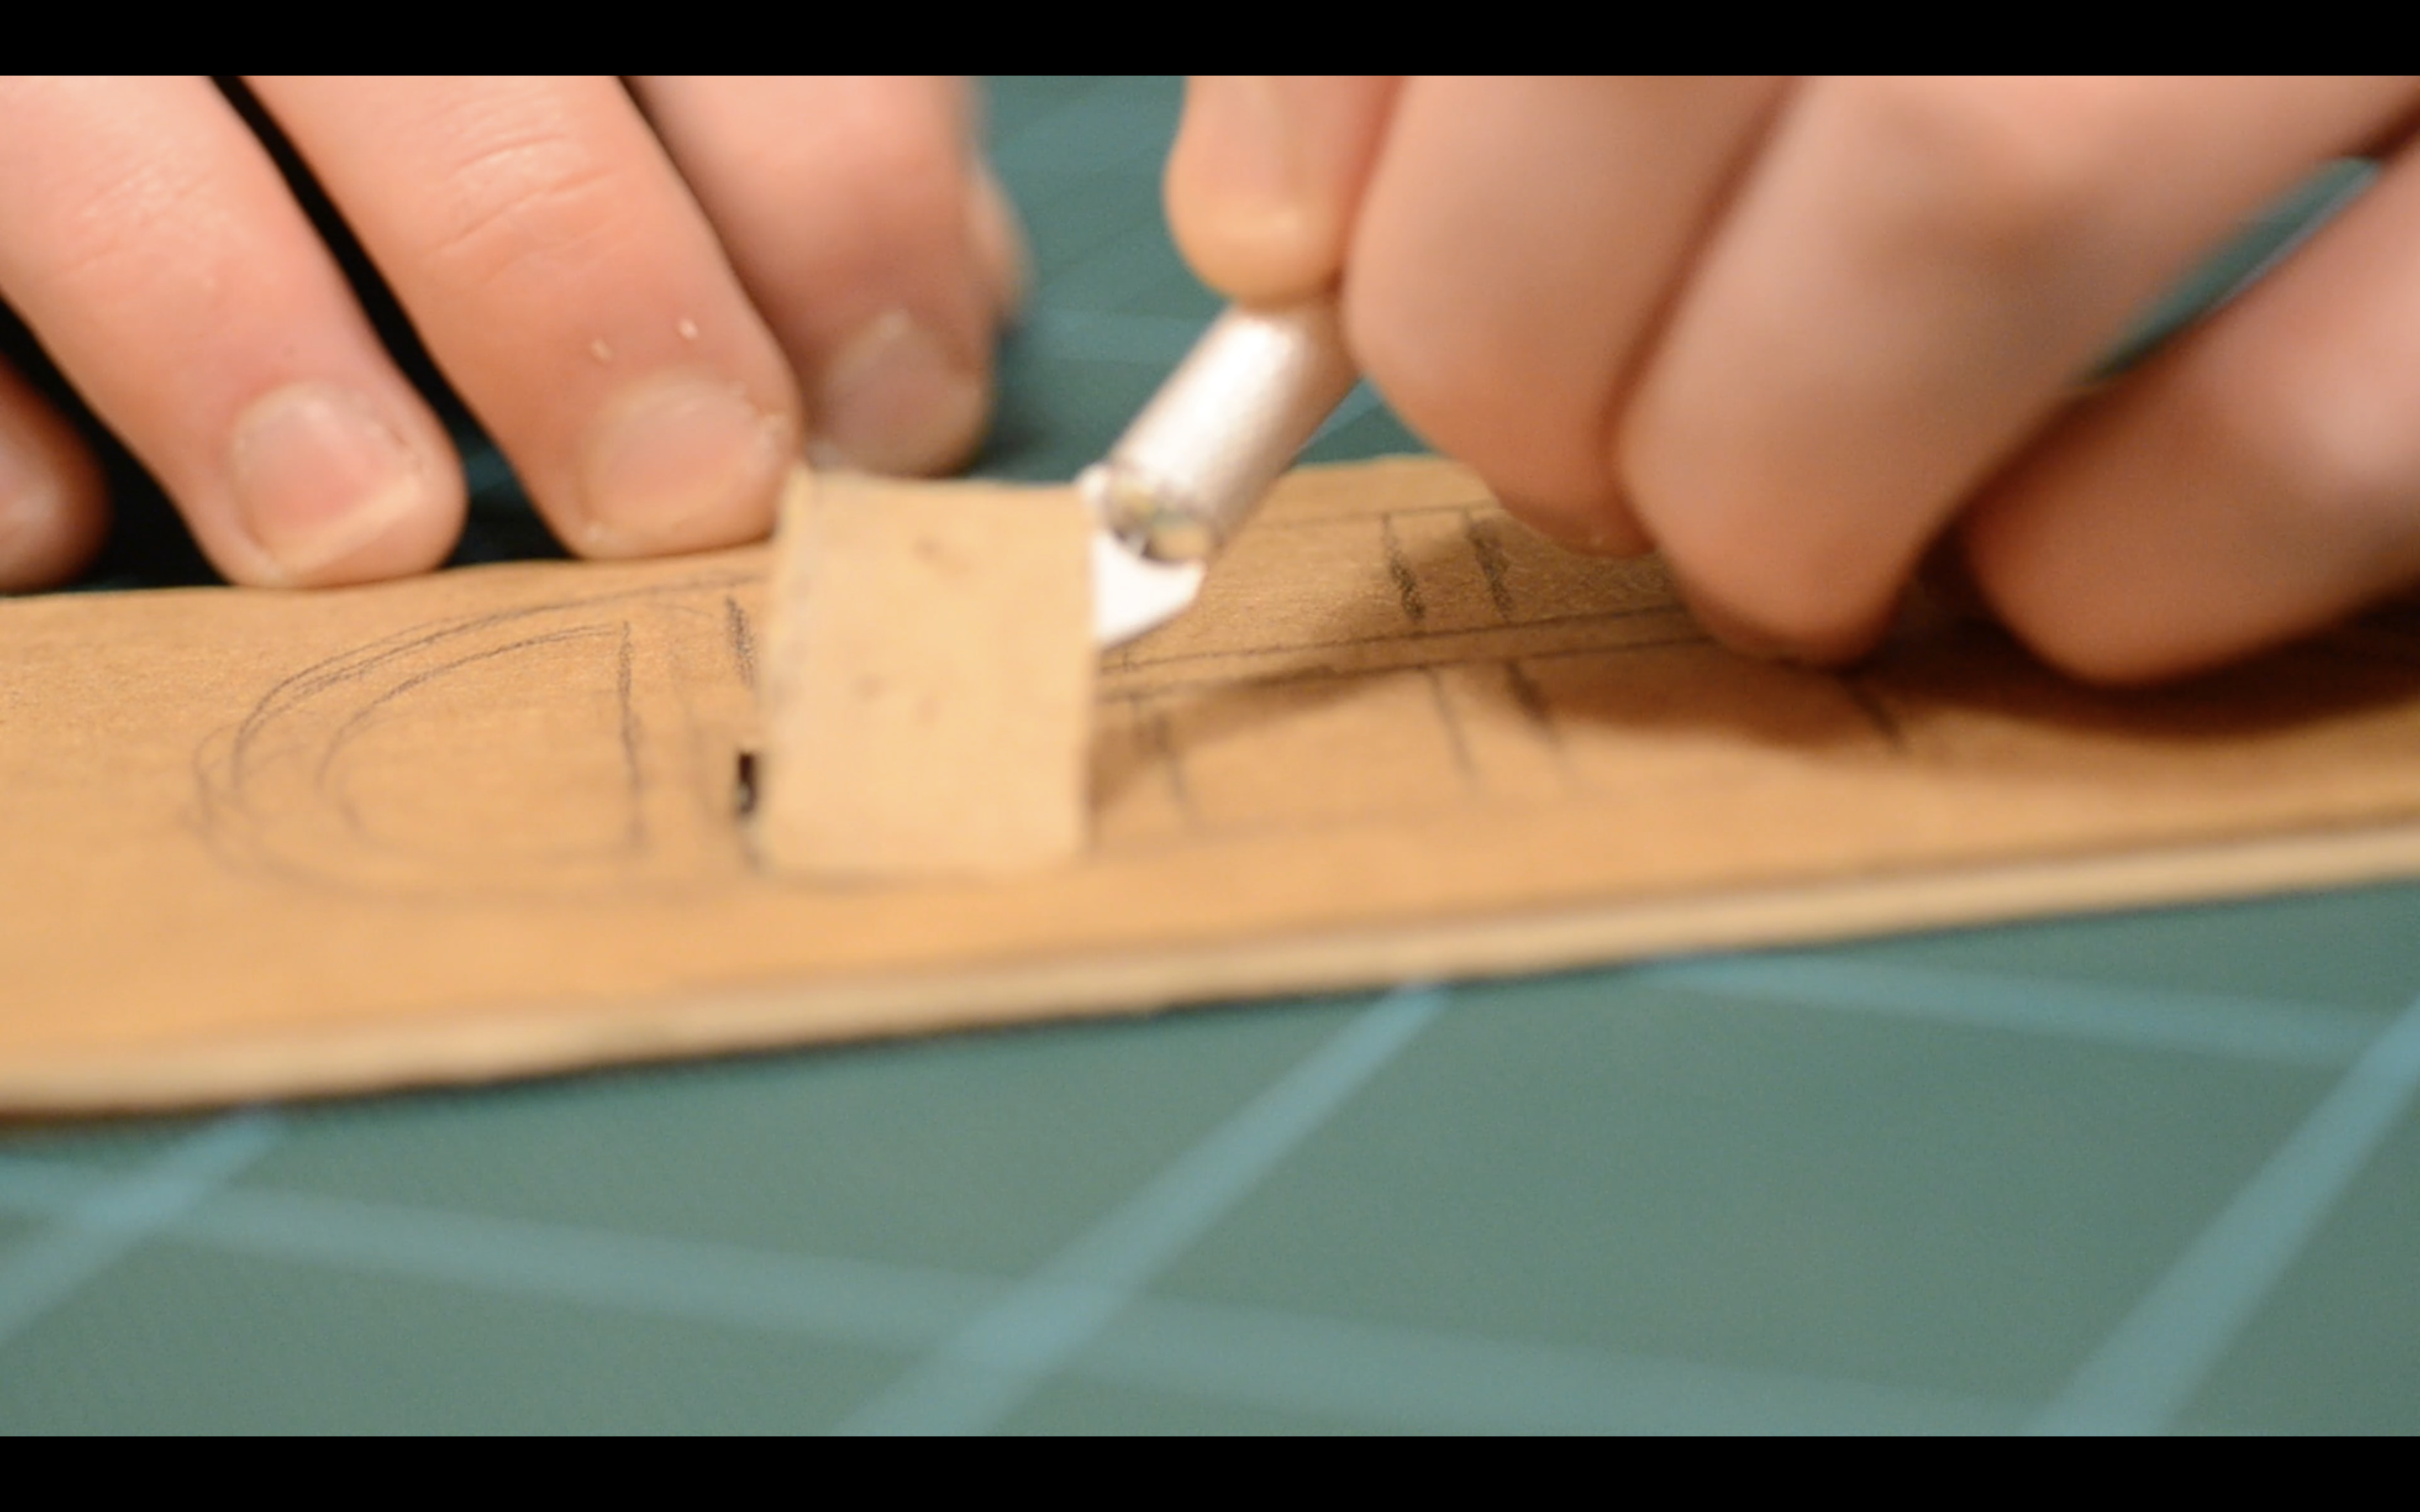
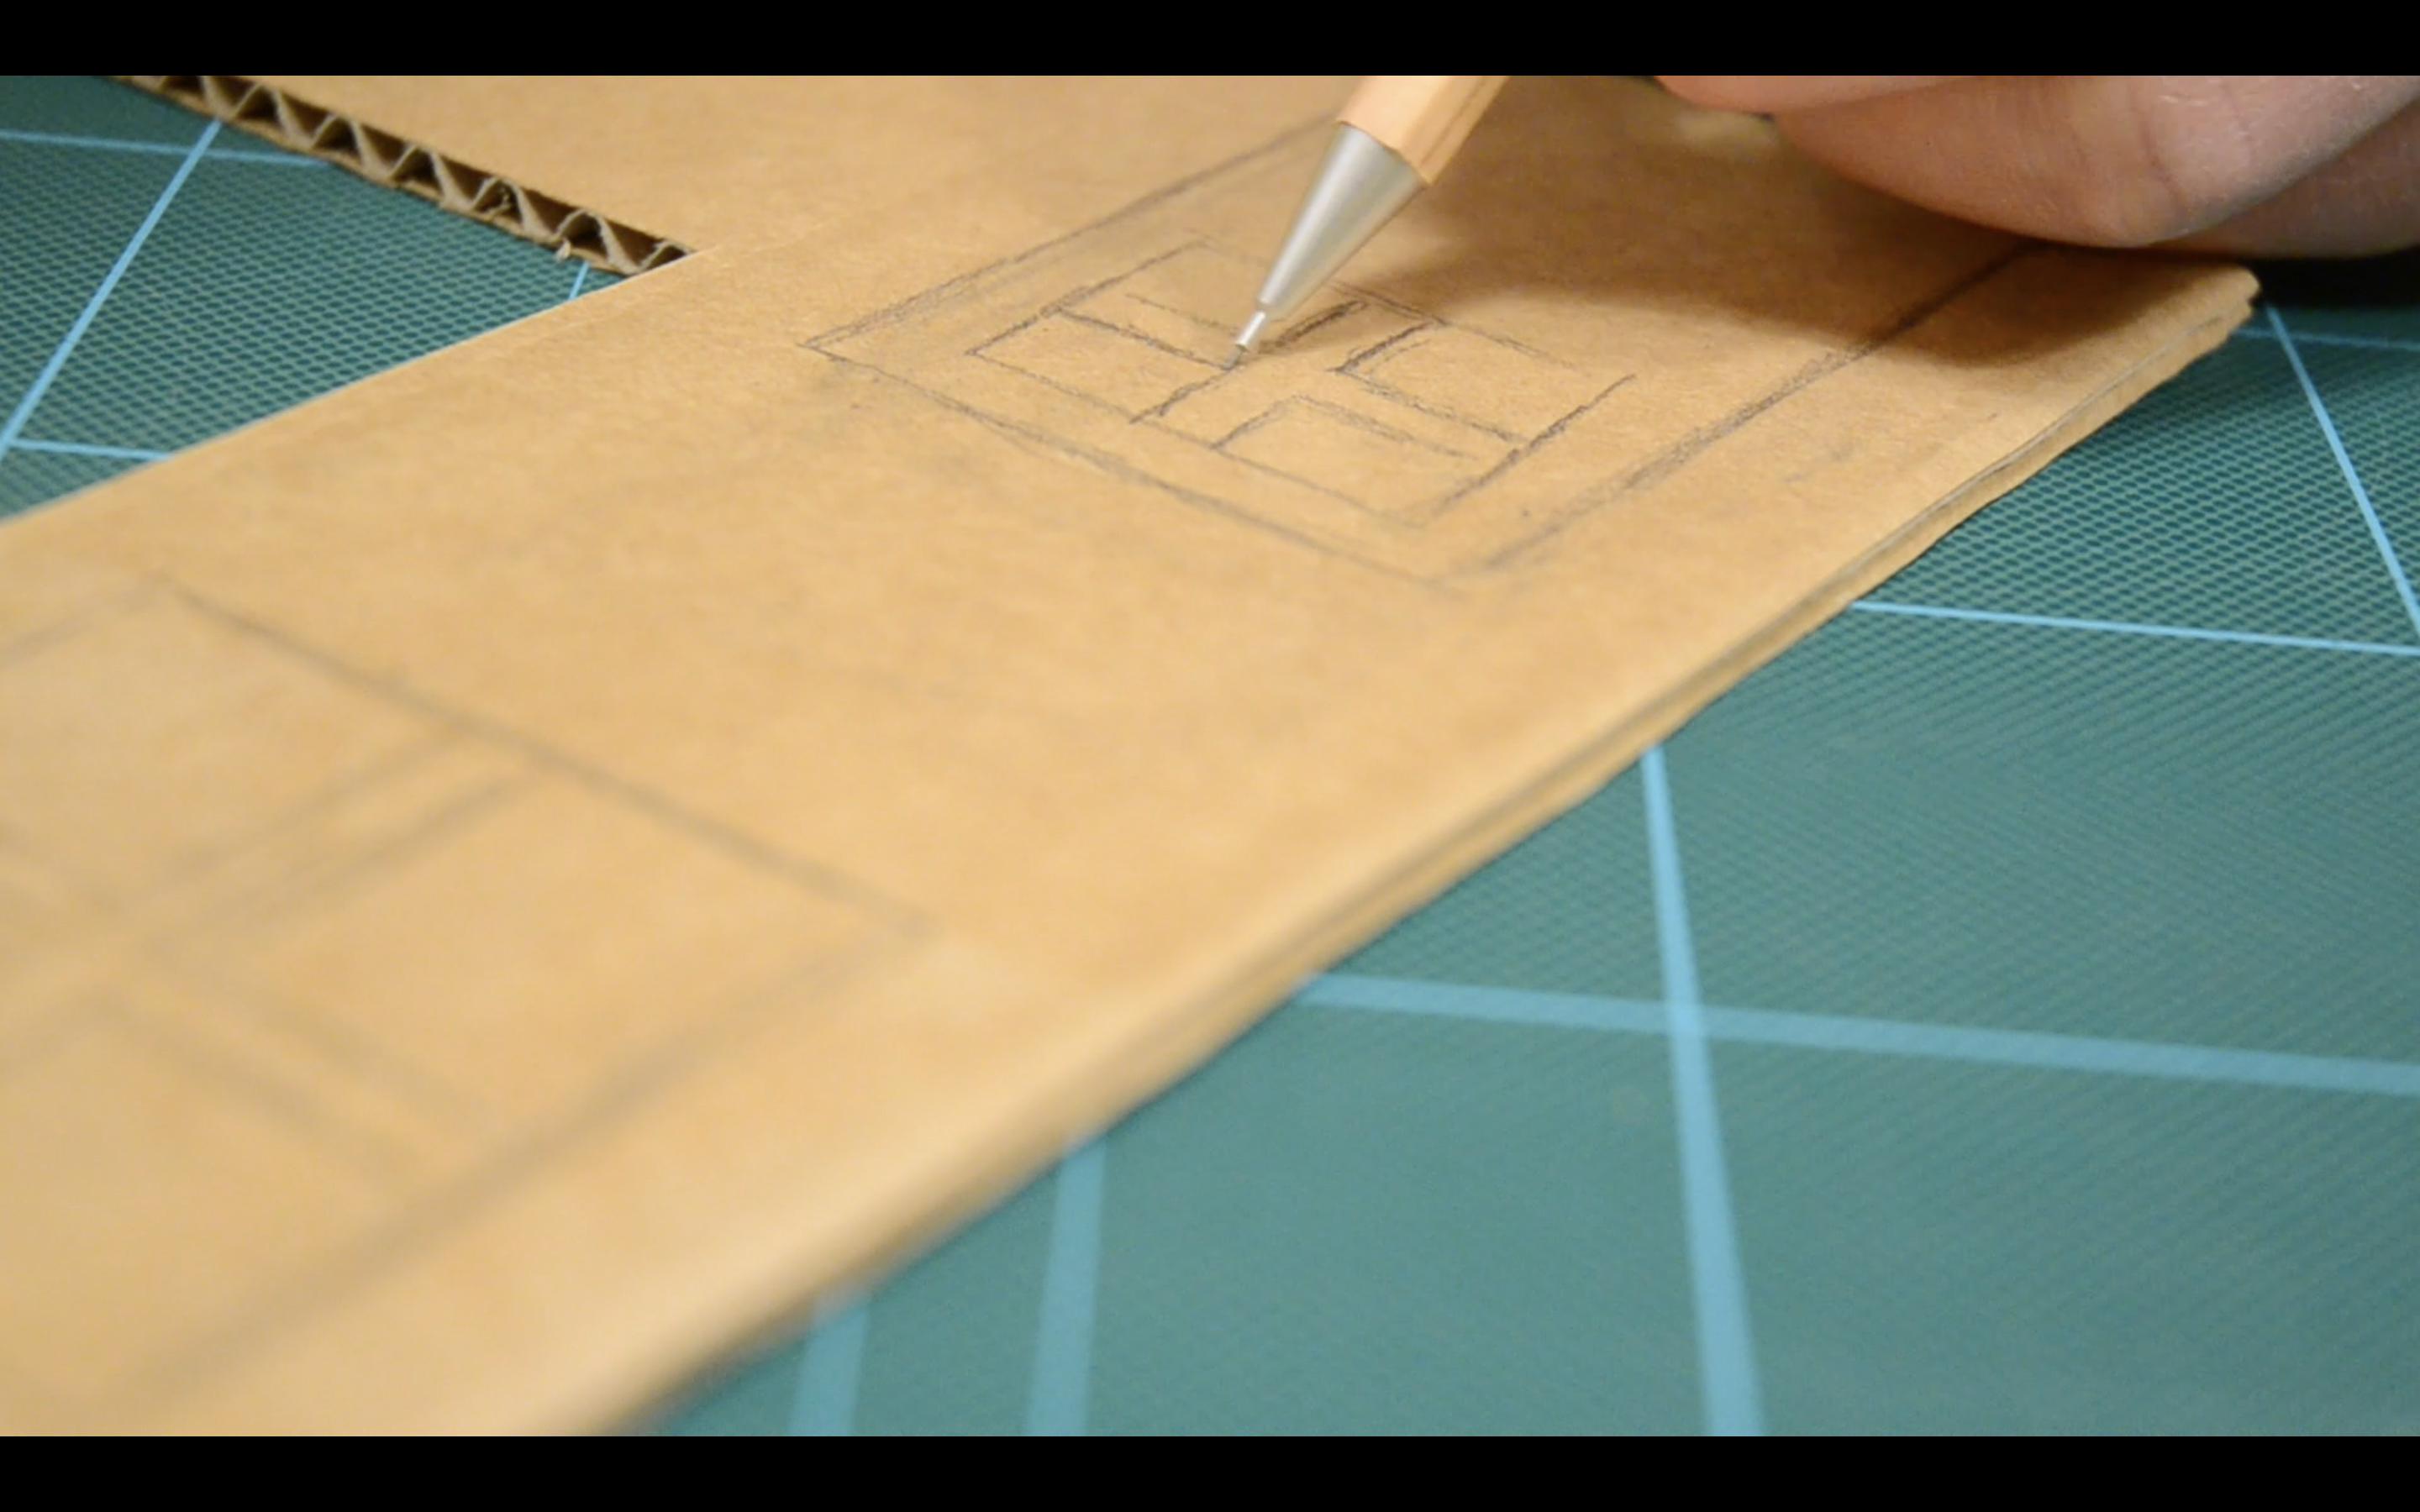
I wanted to film the process of making the large cardboard letters, so I set up my DSLR camera on a tripod and cut up a large cardboard box into six 32cm x 32cm square pieces. I chose to make the pieces square to reflect the square nature of a polaroid photograph. I used a macro lens to film my hands drawing out and cutting each letter.
I also wanted multiple angles on each letter as I was drawing and cutting, so I took footage from over both of my shoulders. I also set up a tiny tripod in front of me on the table to get some close-ups of my hands at work. From this table height I shot footage from my left, right and straight in front of me. This created a wide range of angles that I could cut to during editing to keep the video quick paced and not boring. I made sure to use all 5 angles for each letter and only took a shot a few seconds at a time to make file sizes short and editing quicker. I also kept the shots tight though, so what I was doing would remain a slight mystery until all was reviled in the polaroid image.
Once each letter was finished I would pan the camera across it, or pull the focus to blur it out. This was to give some indication of closure on each letter and let the audience know I was moving onto the next one. While making, I realised that having 6 letters wouldn’t fit the square polaroid frame very well, so I decided to just make the four letters of “LIVE”. Each letter took about half an hour to create and I liked the slightly rough look which gave them a handmade and personal feel.
The next day I cut stabilising triangles and hot-glued them to the letters so they would stand upright. For extra support, I glued them onto a wooden base which I would photograph them on. I wanted my text prominent in the frame so I had to stagger the letters, putting the “L” and the “V” slightly behind the other 2.
I added a tuft of cotton wool to a couple of the chimney pots for a comforting and warm effect. Then I set up a background using the reverse face of a yellow roll of corrugated card, which was all I had that was large enough at the time. I arranged my set-up so it was directly in front of the window and the light from outside shone through the background adding to the warm, homey feeling of the letters.
I took a range of photos and panning shots of the setup. I picked the best photo and edited it into a scanned polaroid frame. I’m really proud of my overall art direction as the final effect is quite expressive and gave the exact feel I wanted.
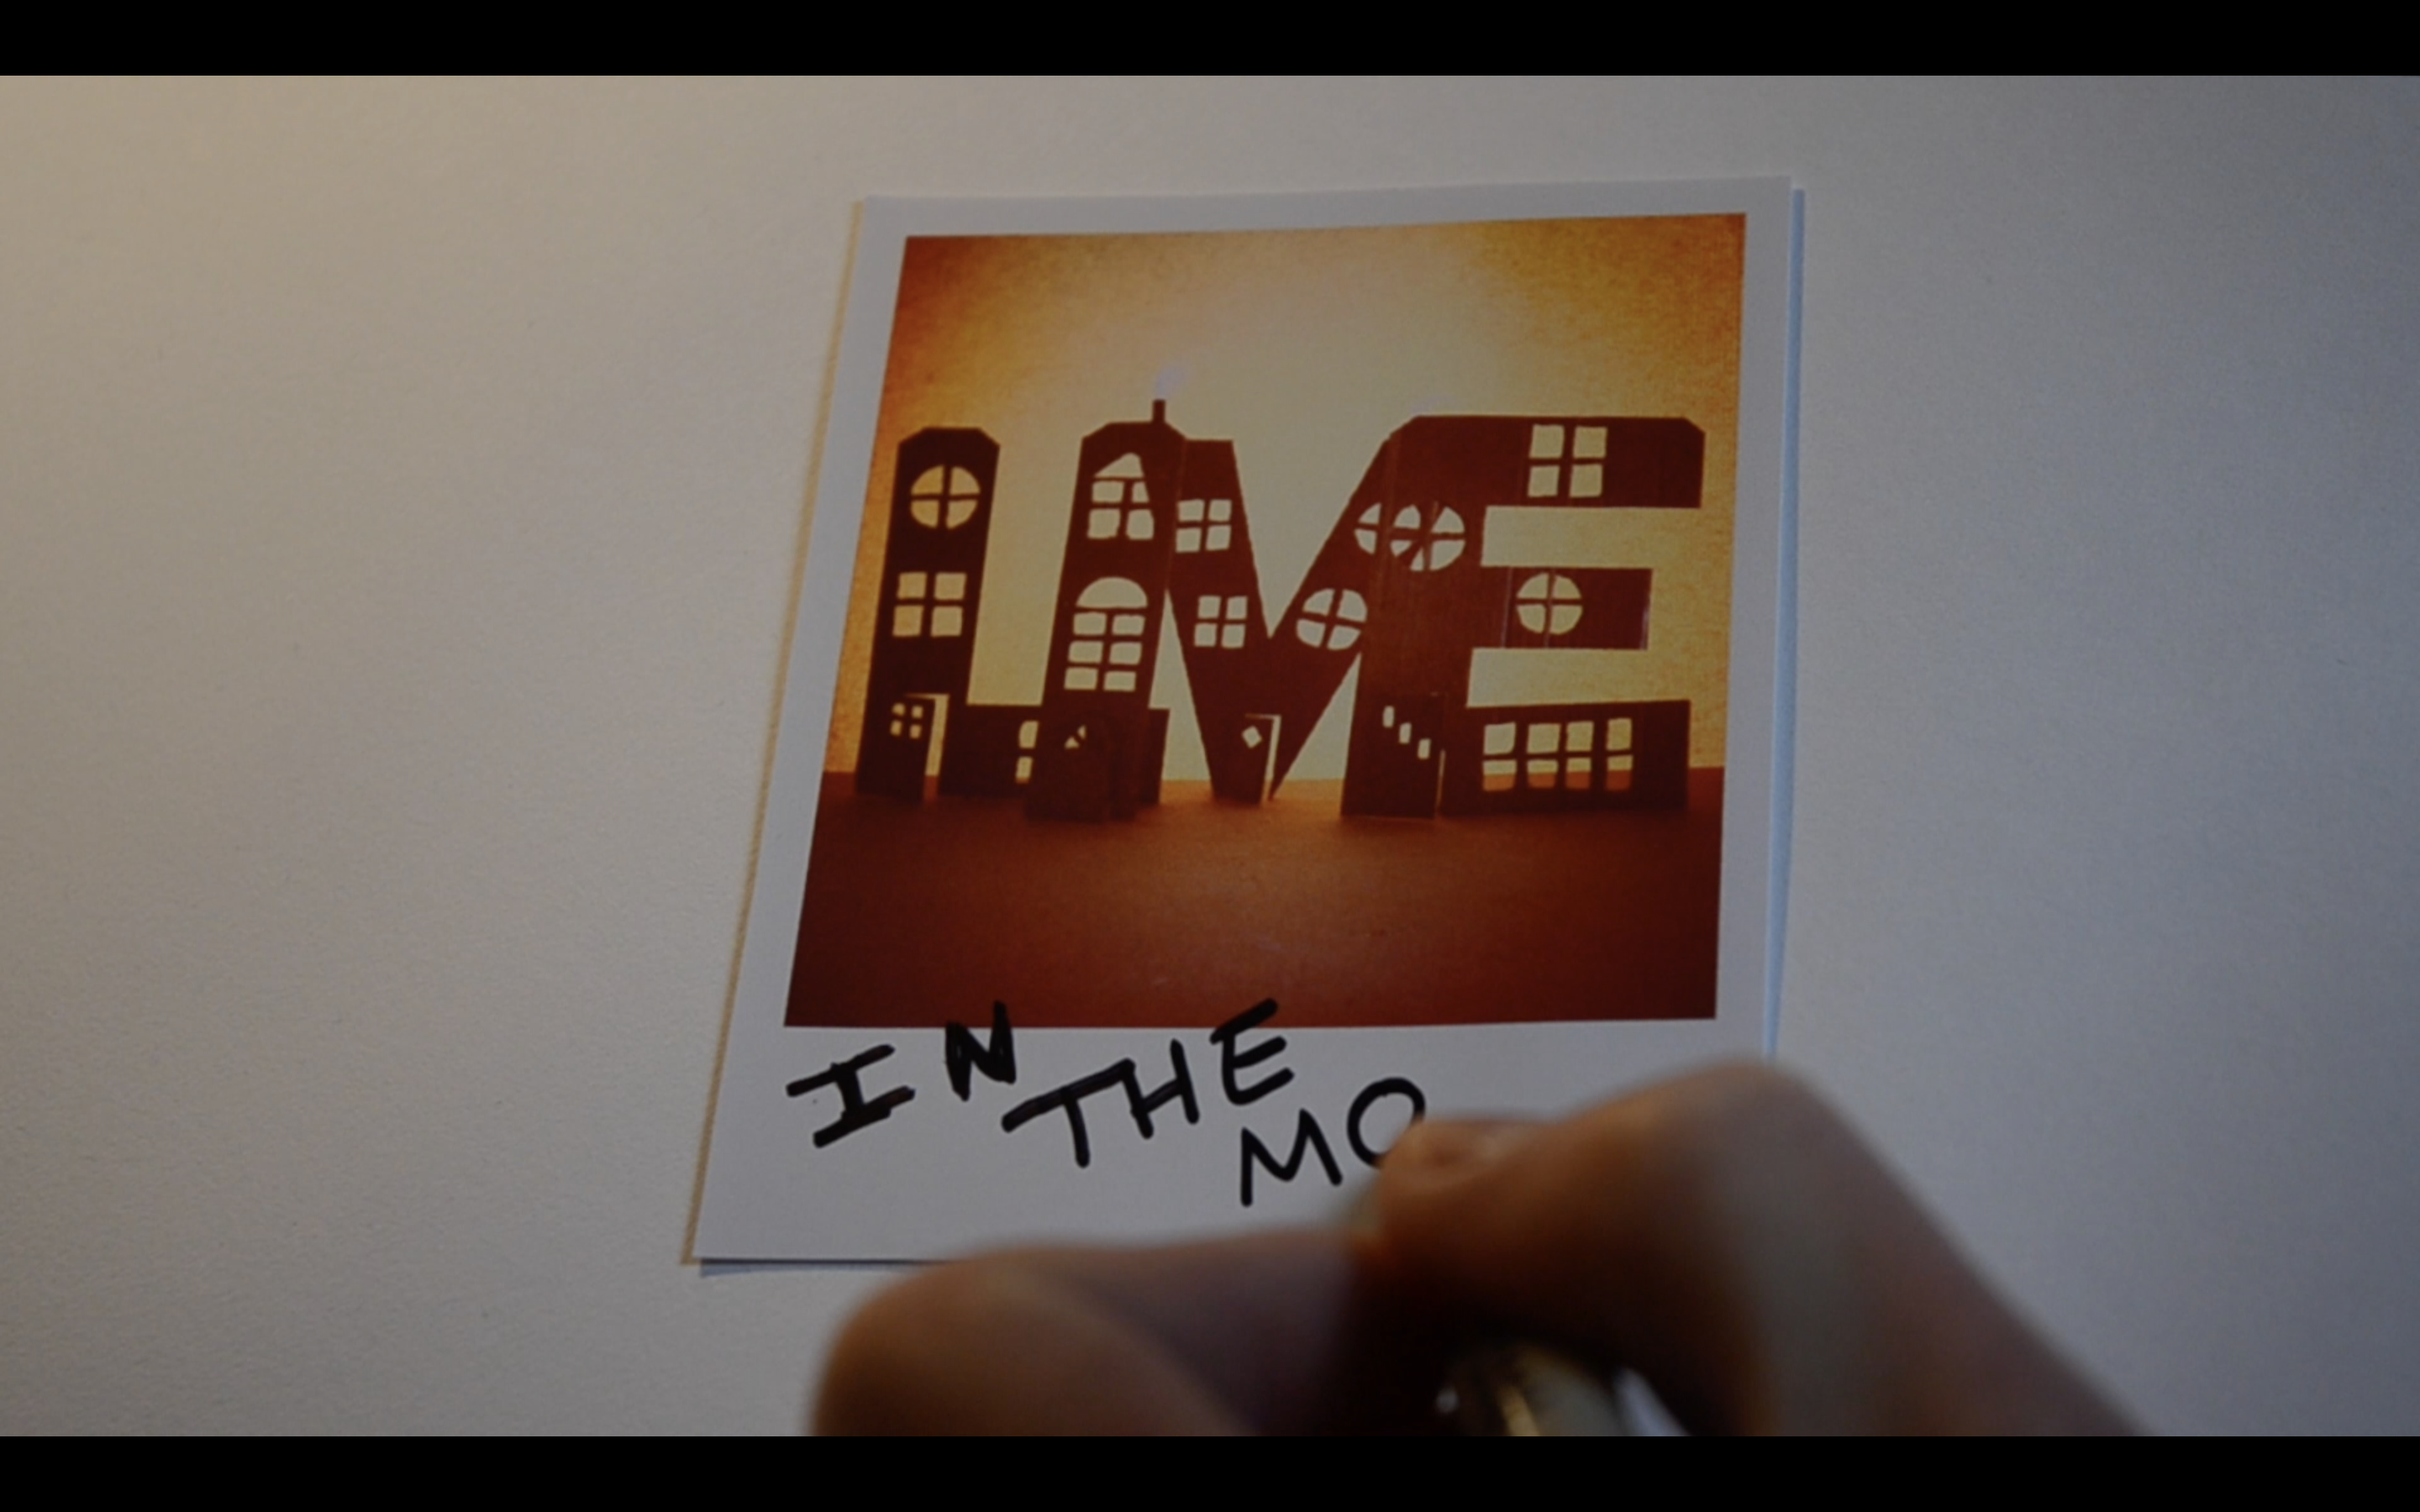
The next step was experimenting with writing “In The Moment” in different styles using black sharpie on printouts of my polaroid, to see which felt the most appropriate. Luckily, the 4th and final test I did proved prefect. On the polaroid I chose (bottom right) I used all caps which meant it stood out and was bold. It also looks natural as it’s quickly written like a real polaroid message, untidy and overlapping the photo a bit. I filmed myself writing each of the experiments, not knowing which might end up being the final one.
I then edited my video footage in Final Cut Pro X. I chose to start my video with the text “Something I’ve Learned In My Life So Far” in a script typeface and then simply had the letter “L” on the screen followed by close ups of me making that letter. One the first letter was finished, the letter “V” comes up and so on for all 4 letters. I felt this added the little mystery I was looking for, building up to a big reveal of all the letters together. I used my panning and focus changing shots to show each finished letter before moving onto the next. I then sped up this footage x2 to turn the making portion into a speed art style video. Each letters construction lasts about 12 seconds which is enough to stay engaged an interested. During this section, I left in some of the pencil scratching and cutting noises because I thought it would help the audience connect and feel like they were really there with me while I was crafting. I had to leave the sounds at normal speed to sound real and just cut it shorter to fit the sped-up footage.
Next, I cut to my large panning clip of all the letters together forming the word “live” then, I wanted to show the polaroid being created and emulate it digitally. I did this by taking my digitally designed polaroid and raising it up from the bottom of the screen into the centre of the frame, with a foley polaroid sound effect to make it feel like it had just been ejected from the camera. Finally, the screen cuts from the digital polaroid to a physical one in front of me and it’s here I placed the footage of me writing “in the moment” on the polaroid. To end, I show a close up of the finished polaroid and blur out the screen. I felt this gave a strong end to the piece.
Next, I cut to my large panning clip of all the letters together forming the word “live” then, I wanted to show the polaroid being created and emulate it digitally. I did this by taking my digitally designed polaroid and raising it up from the bottom of the screen into the centre of the frame, with a foley polaroid sound effect to make it feel like it had just been ejected from the camera. Finally, the screen cuts from the digital polaroid to a physical one in front of me and it’s here I placed the footage of me writing “in the moment” on the polaroid. To end, I show a close up of the finished polaroid and blur out the screen. I felt this gave a strong end to the piece.
I used the royalty free music “Fruits by JayJen Music” because it starts methodical and then changes tempo and becomes more upbeat and fun as it progresses. I cut my footage to it in some places to tie both the footage and music together. I think the slight ambiguity of the crafting portion of the video allows for a fun second viewing because now you know what I’m making, you can pay more attention to how I’m making it instead.
I scanned my chosen hand-written polaroid at 300dpi and printed it on A3 glossy paper as my poster. I’m quite proud of it as the oversized polaroid really stands out and looks intriguing as it your mind isn’t used to seeing a polaroid such a large scale. I found this project really fun think I fulfilled the brief well.